Saturday, April 5, 2014

Seeds this Spring - Beets

Okay, so its spring and we are all getting ready for what we will be doing in the garden. This means that we are all getting our seeds. I know that I am. I ended up buying my seeds and then noticed later that one seed company in particular had a great value to the seeds. So lets take a look shall we. Lets look at the beets that I bought.

For zone 5, you want to start seeding your beets outside April 12- May 5.

Here is what I bought


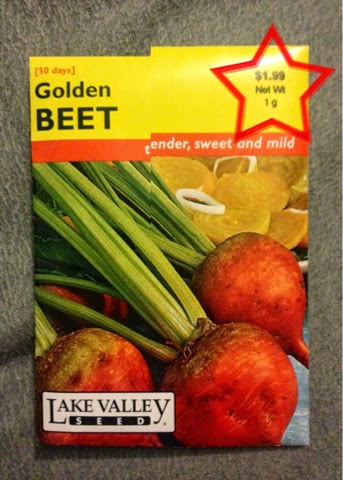
I got these 3 because I wanted a unique blend of beets. I bought Chioggia, Bulls Blood, and Golden. What I noticed was the gram size of the seed packets according to the brand. 

Livingston Seed Co. seems to be the brand to get. They have 4 times as much seed as Lake Valley Seed brand, 4 grams as compared to 1 gram. Plus here is the kicker, Libingston Seed Co. costs less, $0.70 less! Wowzer! Look and compare 


Tell me what you think. I know for sure, that Livingston Seed Co. is the way to go. Not to mention, they they were heirlooms.

Thursday, April 3, 2014

Seed this Spring- Peas

Okay Kids, lets talk about peas. Everyone loves peas, unless you are a 7 yr old. So I am behind in my planting, I am going to contribute it to the extremely cold weather. But hopefully you have started your peas. I am going to sow mine this week.

Here is what I have. I bought 3 packs so that I can have plenty of seeds. 


In my Zone, Zone 5, you should be planting peas around March 15 - April 5.

I always believe in soaking my seeds before planting them. It increases the germination rate and speed!

Monday, May 20, 2013

What's New

So Kids, took my mom and my sister out to the GreenHouse. Boy was that fun, the weather was perfect and it was such a lovely country drive. It was part of my mom's Mother's Day gift. We got a lot of really great plants, here are a list of some of them. Thats one thing that I really love about Spring, you get this fun feeling.


So Here is a real interesting plant we got. The Mexican Gherkin Cucumber was on of those really different plants I found. It is an heirloom variety that produces small 1 inch perfect for pickling!


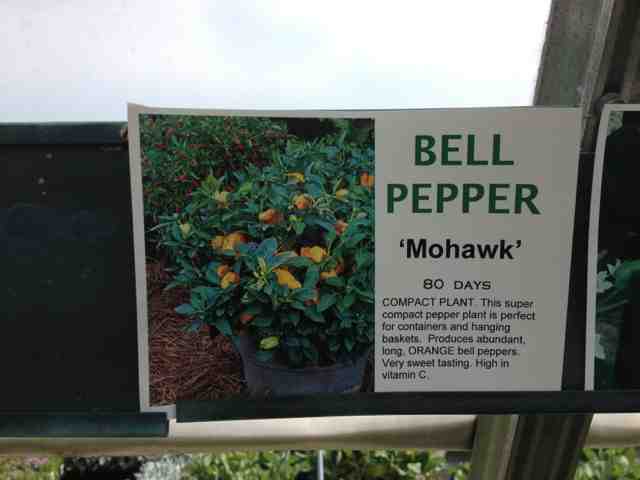
This was another really fun plant, not even because of the uniqueness, but mostly because of the sign...So funny!

This is also really cool, Shiso smells amazing, like a mix between basil and mint. Plus it can be used to color drinks!


I can't wait to see how these fun plants turn out!


Friday, May 3, 2013

Bok Choy


This year I have a lot of Really fun greens that I will be planting. One unique green is Bok Choy, sometimes called Pak Choy. I am planting a Red and Green variety. They should be planted every 12" apart, and can be used as a cutting green or harvest all at once, like a one stop shop. Unfortunately they are also susceptible to the vial Flea Beetle. Me and the Flea Beetle are not very good friends, they have destroyed many an eggplant in my garden...Who knows maybe this year we will have better luck. Lets gross our fingers.
Red Bok Choy on Left and Green Bok Choy on Right.

Later on when I harvest, I will post another video on the total process  But here we go...the 1st video ever on this blog.


Thursday, April 25, 2013

Fairy Gardens

I don't know about you, but I have have seen the sudden  rage for fairy gardens everywhere. Every garden center I step into has a dedicated section for these adorable little gardens. I have to admit that even I have a VERY small collection of fairy decor.


As I look around I find that these fairies live better than I do... I mean some of these fairies have cooler houses and more furniture than I do, not to mention is way cheaper than my furniture, seriously though!

Here are a couple of fairy gardens that are portable! What a great idea! This way you can move your faires where ever they are happiest.
Portable fairy garden: Baby Cabbage Fairy in mushroom home.

Portable fairy garden: Mushroom home

Portable fairy garden: Fairy looking with violas.

Portable fairy garden: okay, so not a fairy garden, but could easily be turned into one.

Portable fairy garden: Fairy looking dainty with birdbath

Portable fairy garden: I love how the little fairy is trying to get her cat down from the tree., as the turtle watches

Also The Little Hedgerow is a link to find fairy garden supplies, just in case your local nursery is CRAZY and doesn't have any fairy garden supplies. They have some really cute supplies pictured below.


A small selection of Fairy Garden Supplies from The Little Hedgerow store at Etsy.

Wednesday, April 25, 2012

Update to the yard

So here is the new front yard. I really like the twin centinal boxwood planters, they add a lot of elegance to the front walkway. Before the box woods there was only one pot on the right hand side and while it didn't look bad, this looks way better. Plus it was all super cheap. The boxwoods were on sale for $15 each, the pots were free from another job, and the soil was from last year. So really, this only cost me $30 total. Woot woot

Wednesday, January 4, 2012

DIY Day

Tea boxes. Do you ever get annoyed with how they just clutter up your cupboards with random half filled boxes and the occasional loose tea bag that wanders around? You can never seem to find the teas you want because they are never where you put them last. Well leave it to me to attempt and fix this problem. We are a huge Tazo Tea drinking family. So we have lots of the Tazo Tea tins that end up just being thrown away once we are done with them. Not any more.

I recently have been seeing a lot of people doing stuff with the chalkboard paint. If you haven't heard about it its very cool. You can write on it with chalk and it rubs write off. *light bulb* Why not use the chalk board paint to re-purpose my Tazo tins into Tea tins!
Valspar makes a chalkboard paint and I found it to be AMAZING!!!!
Materials Required


The tin painted and waiting to dry off.

Steps:
  1. Prepare your work area. Lay some newspaper down so as not to get the paint anywhere.
  2. With your masking tape, tape around the edges of the label. This will ensure that you don't get any paint the spots you don't want it.
  3. grab your brush and start painting it.
  4. The Finished Project.
Mine took about 15mins to dry completely. Now you can either use chalk or paint pens on the new tin. I am using the paint pens because they look a little better and are a tad more permanent. To remove the paint pens from your tin, get an alcohol wipe and wipe the paint pens off. Its perfect!

Side Note:
Thanks Aunt K for sending the delicious cookies!!!! They tasted so yummy, and looked so good in the pictures! :)

Aunt K's Cookies

Tuesday, January 3, 2012

Vegan Yum Yum! Sweet Chili Lime Tofu with Collards and Quinoa

Have you ever been in the mood for a random food, and just like that you have to have it. Well the food that I was in the mood for was VERY random. Tofu. Yes tofu was my randomness. I stumbled upon Lauren Ulm's blog named Vegan Yum Yum. Check it out, its AMAZING!!!! My mom has been following her forever, but I just now "discovered" her... She has a recipe for a Sweet Chili Lime Tofu with Wok Steamed Collards and Quinoa. Just the description makes my mouth water!

So I made it and it was the most tasty, delicious tofu I have ever had! Go to her blog to get the list of ingredients and directions on how to make this, because it was AMAZING!!!!

Another reason I wanted to make this dish was because my friend Danielle just got back from a visit in Florida where she brought me back some delicious citrus! Fresh Florida oranges, tangerines, lemons, and limes!
Ingredients for tofu glaze. The limes are from Florida, the garlic is from my garlic, and are the pepper flakes!


Some of the Herbs for the Quinoa and the sweet and spicy cause.
A helpful tip for this recipe. Vegan Yum Yum says to bruise the Cardamom pods (Bottom Left). I had no Idea what this meant. So like any respectable person from the 21st century...I Googled it. What it means to bruise a Cardamom Pod is to crush like you would garlic. Lay the pod on a cutting board, then place the flat surface of the knife on top of the pod. With you bottom of your palm hit the knife hard enough  to split the pod open but not hard enough to crush it.

Collards from the Garden.
So I am still harvesting the collards that I planted this spring. Talk about being productive! We have had such a warm December that the collards were beautiful and I got quite a lot of collards!

This is the Finished Product.
A huge thanks to my friend Cherry who made the serving plate that the food is on. I love the huge crack running through the middle.